Everything you need to set up SecondDisk, back up your photos, contacts, and files to your email, and find them again later.
Download SecondDisk from Google Play or install the APK from our download page, then open it.
SecondDisk opens to the Data Backup Center, with a card for each backup type — Photo Backup, Contacts Backup, and File Backup — plus a Backup Records button and a settings gear in the top corner.

Before your first backup, tell SecondDisk which email account to send backups to. Tap the settings gear on the home screen, then add an email under Email Configuration.
Type the address your backups will be sent to in Sender Email.
In Authorization Code, paste the app password your email provider generates (often a 16-character code) — not your normal login password. On providers that support it, you can tap OAuth Login to sign in instead.
Use Send Test / Receive Test to confirm it works, set the Attachment Size if you wish, then tap Save.
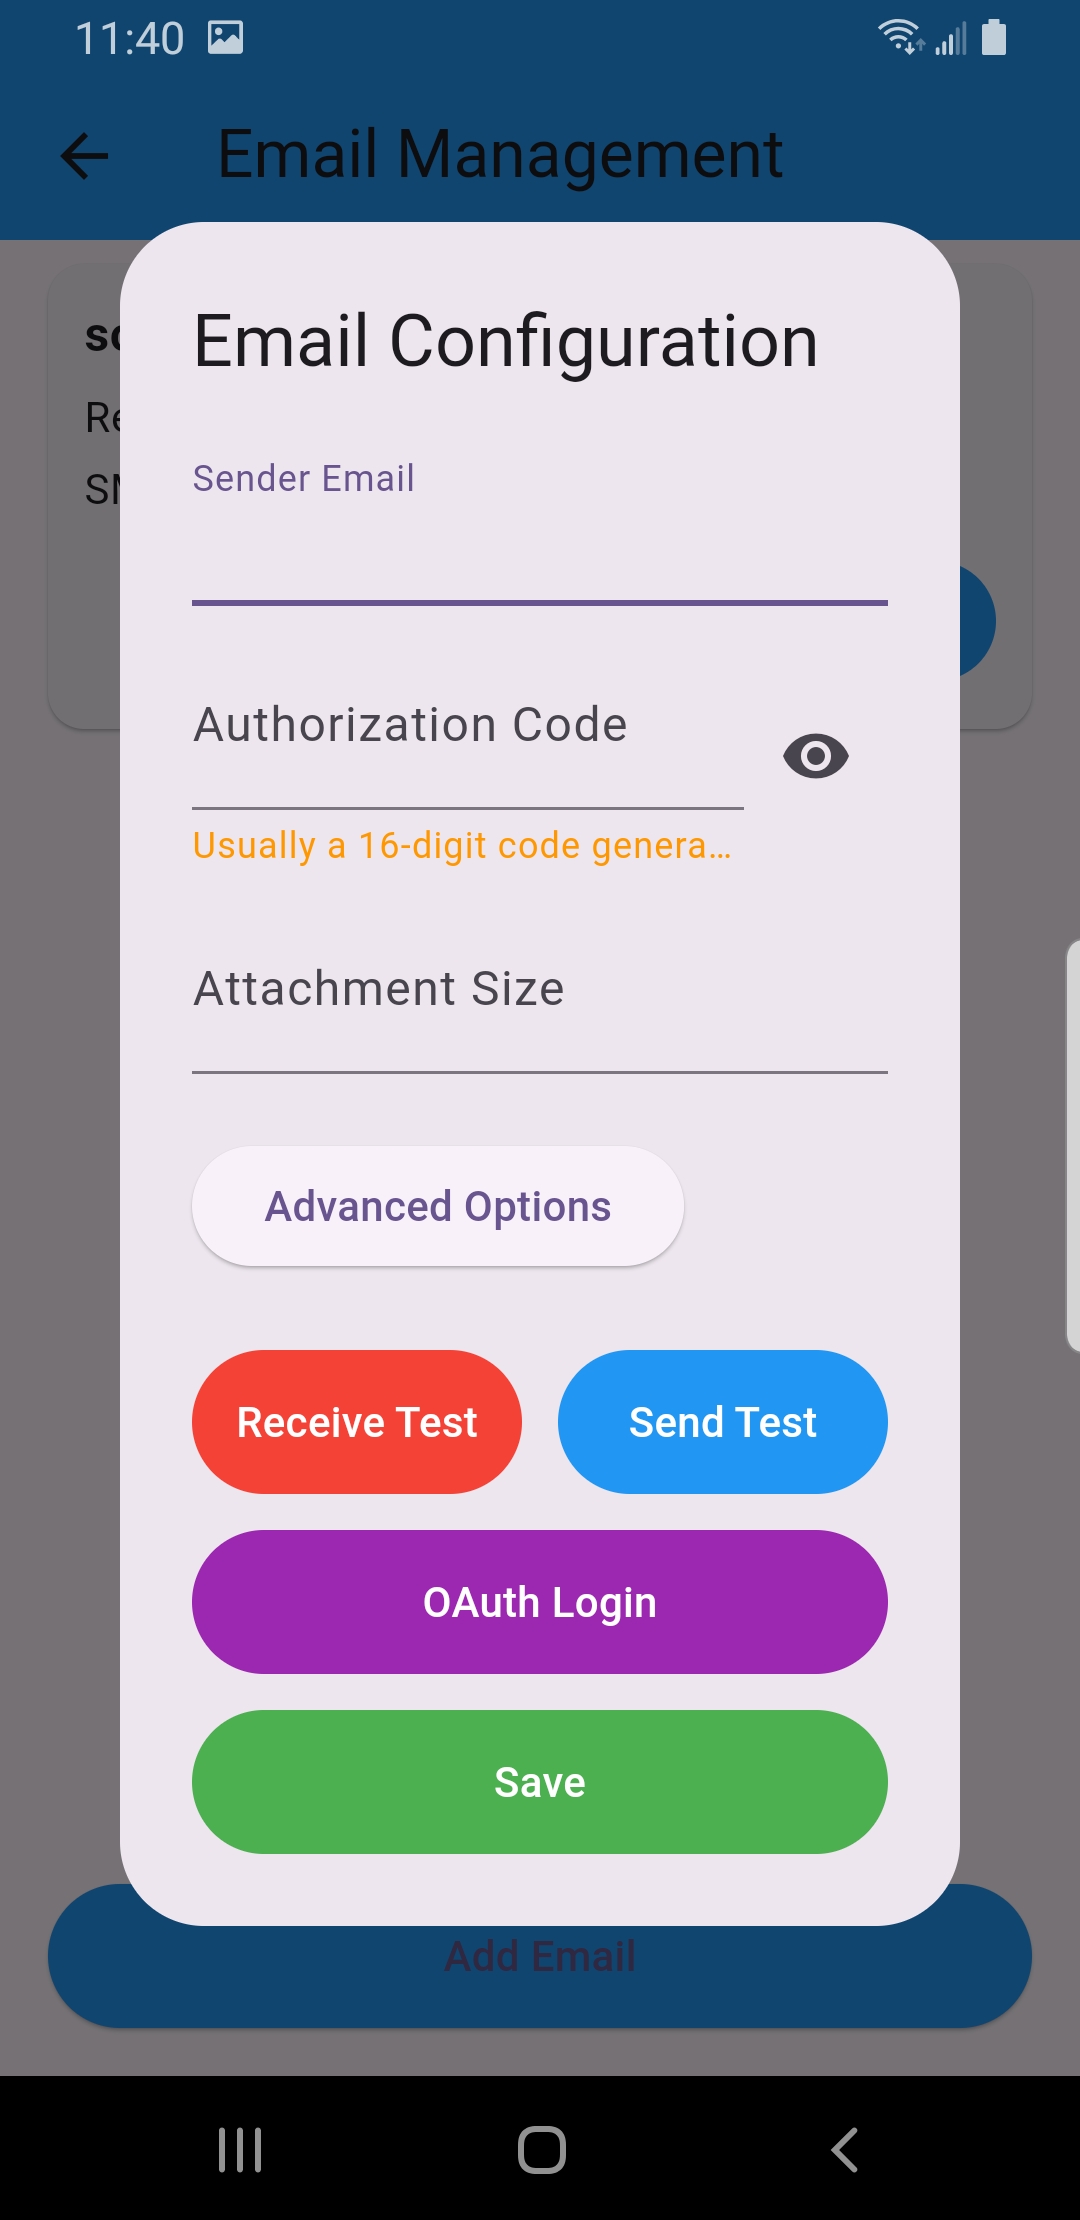
About the authorization code: most providers (Gmail, Outlook, QQ, 163…) require an app password for third-party apps. Generate one in your email account’s security settings and paste it here.
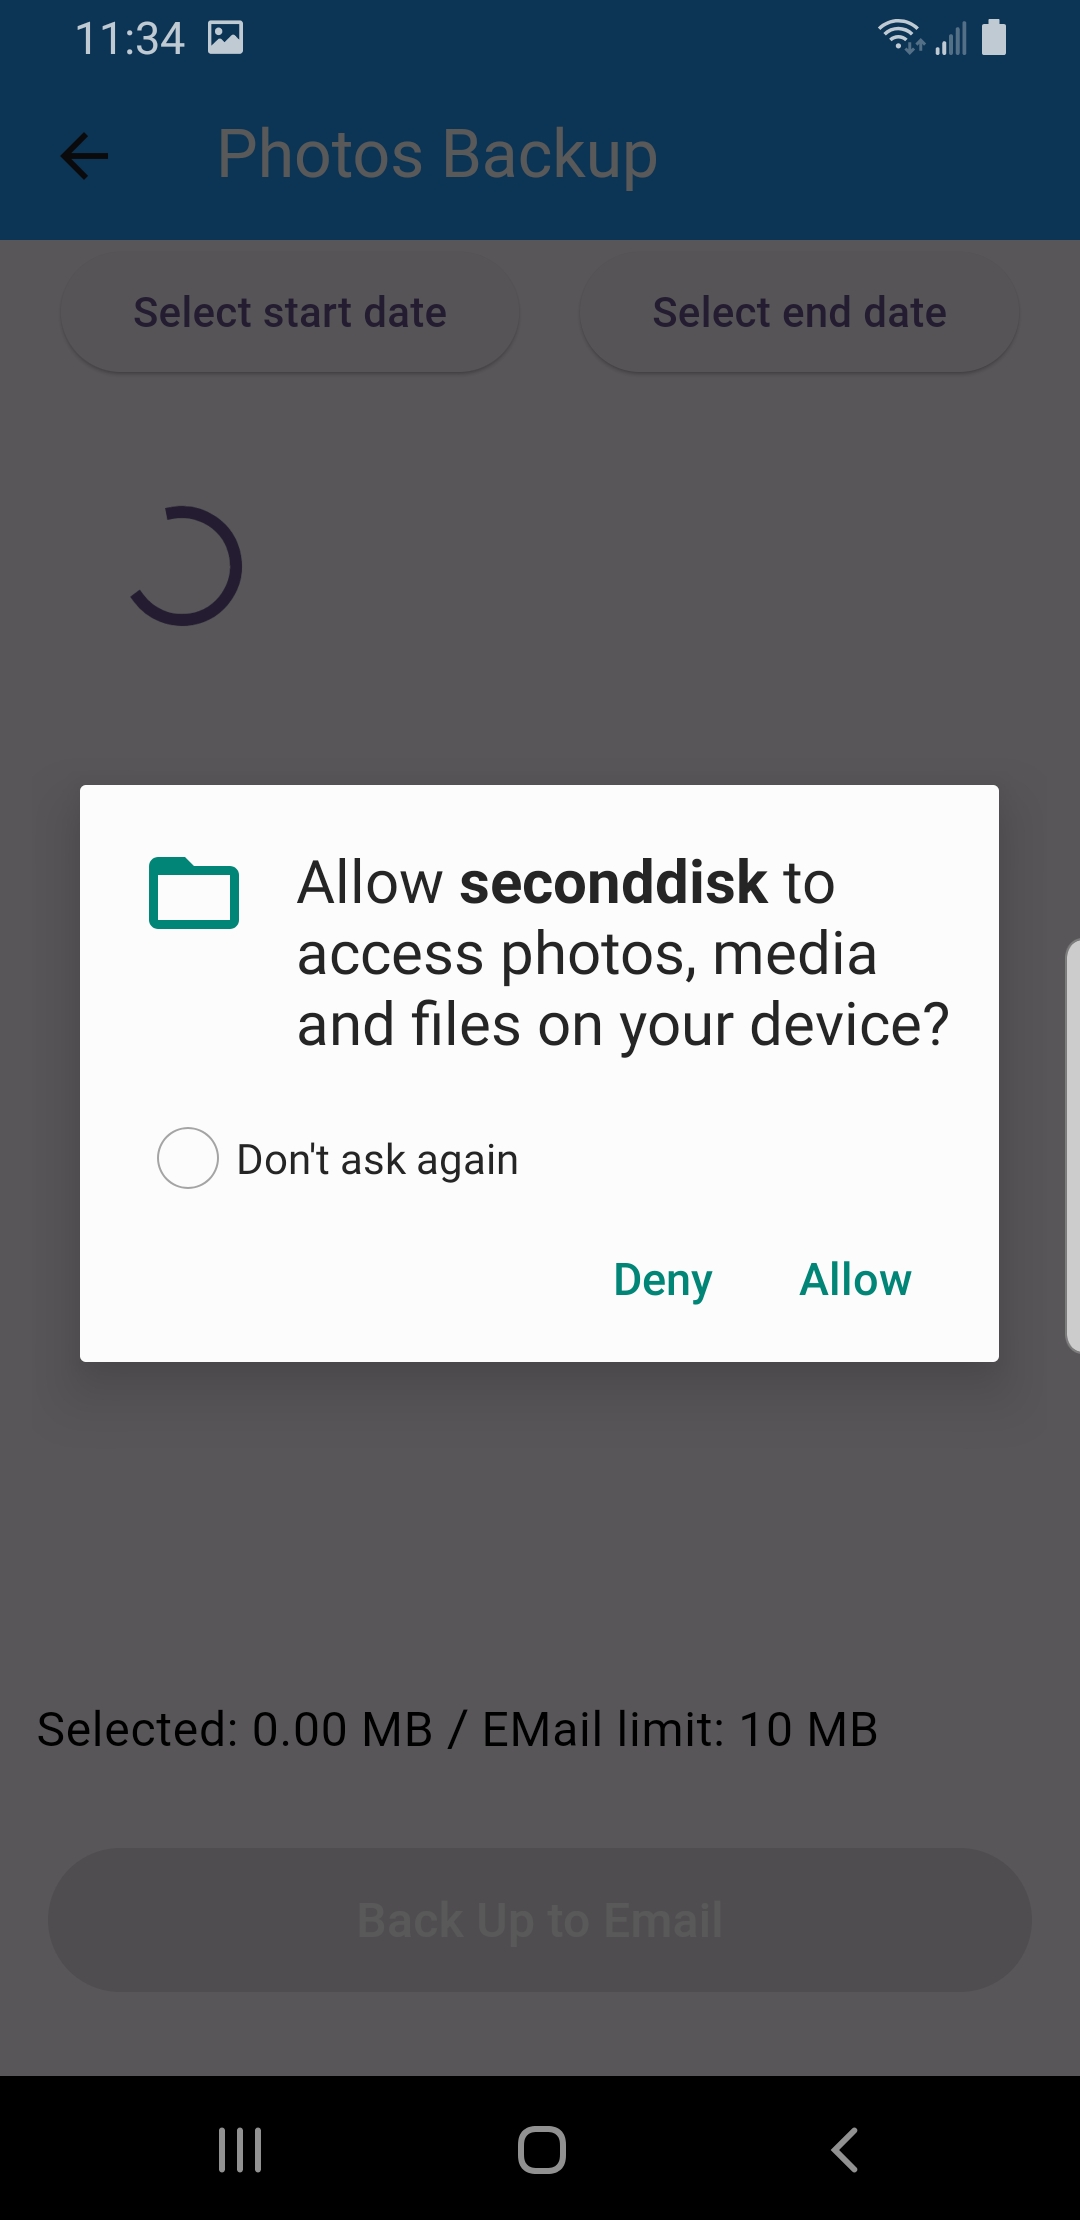
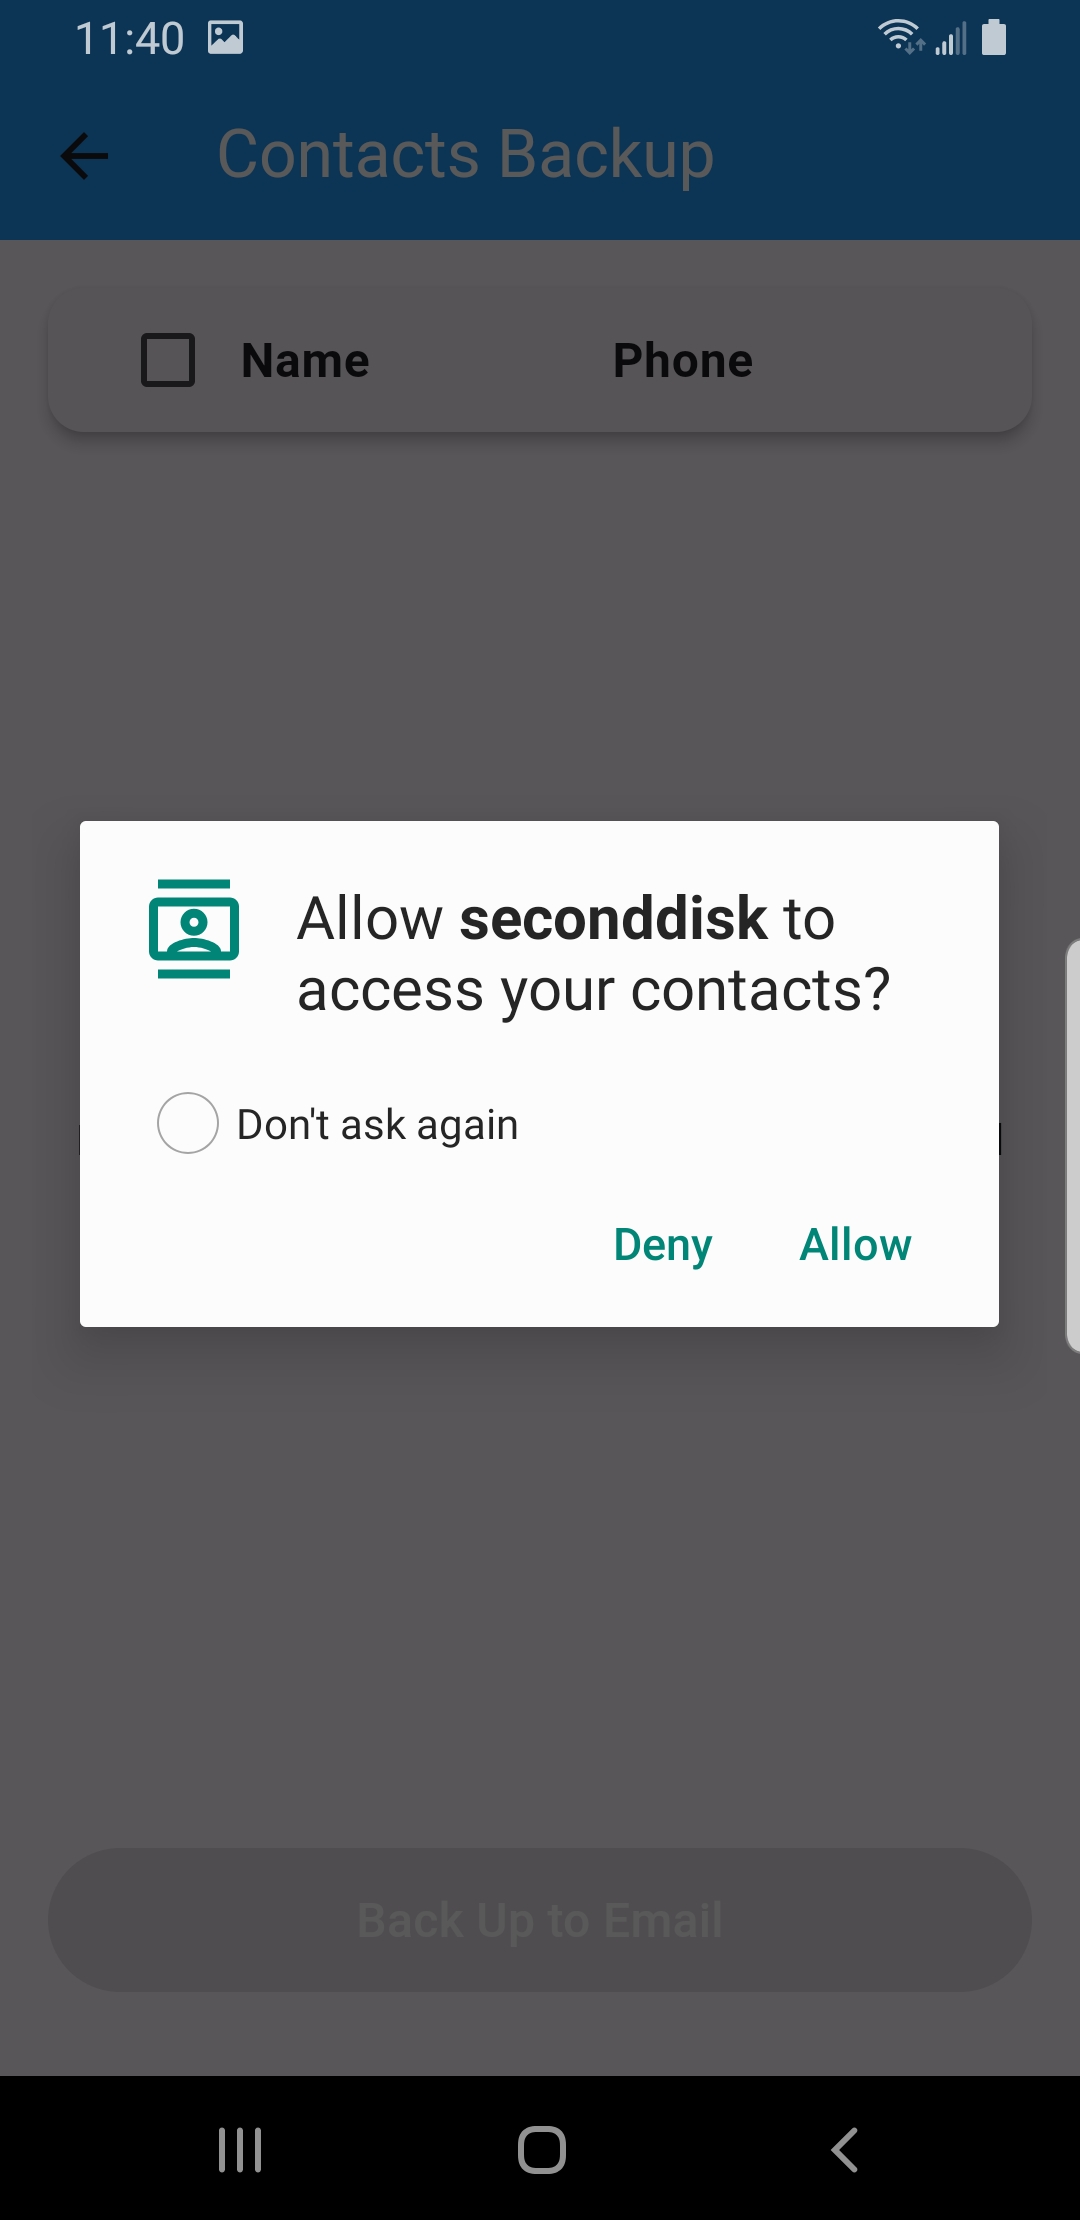
The first time you open Photo Backup or Contacts Backup, Android asks permission to read that data. Tap Allow so SecondDisk can include it — it only reads what you choose to back up.
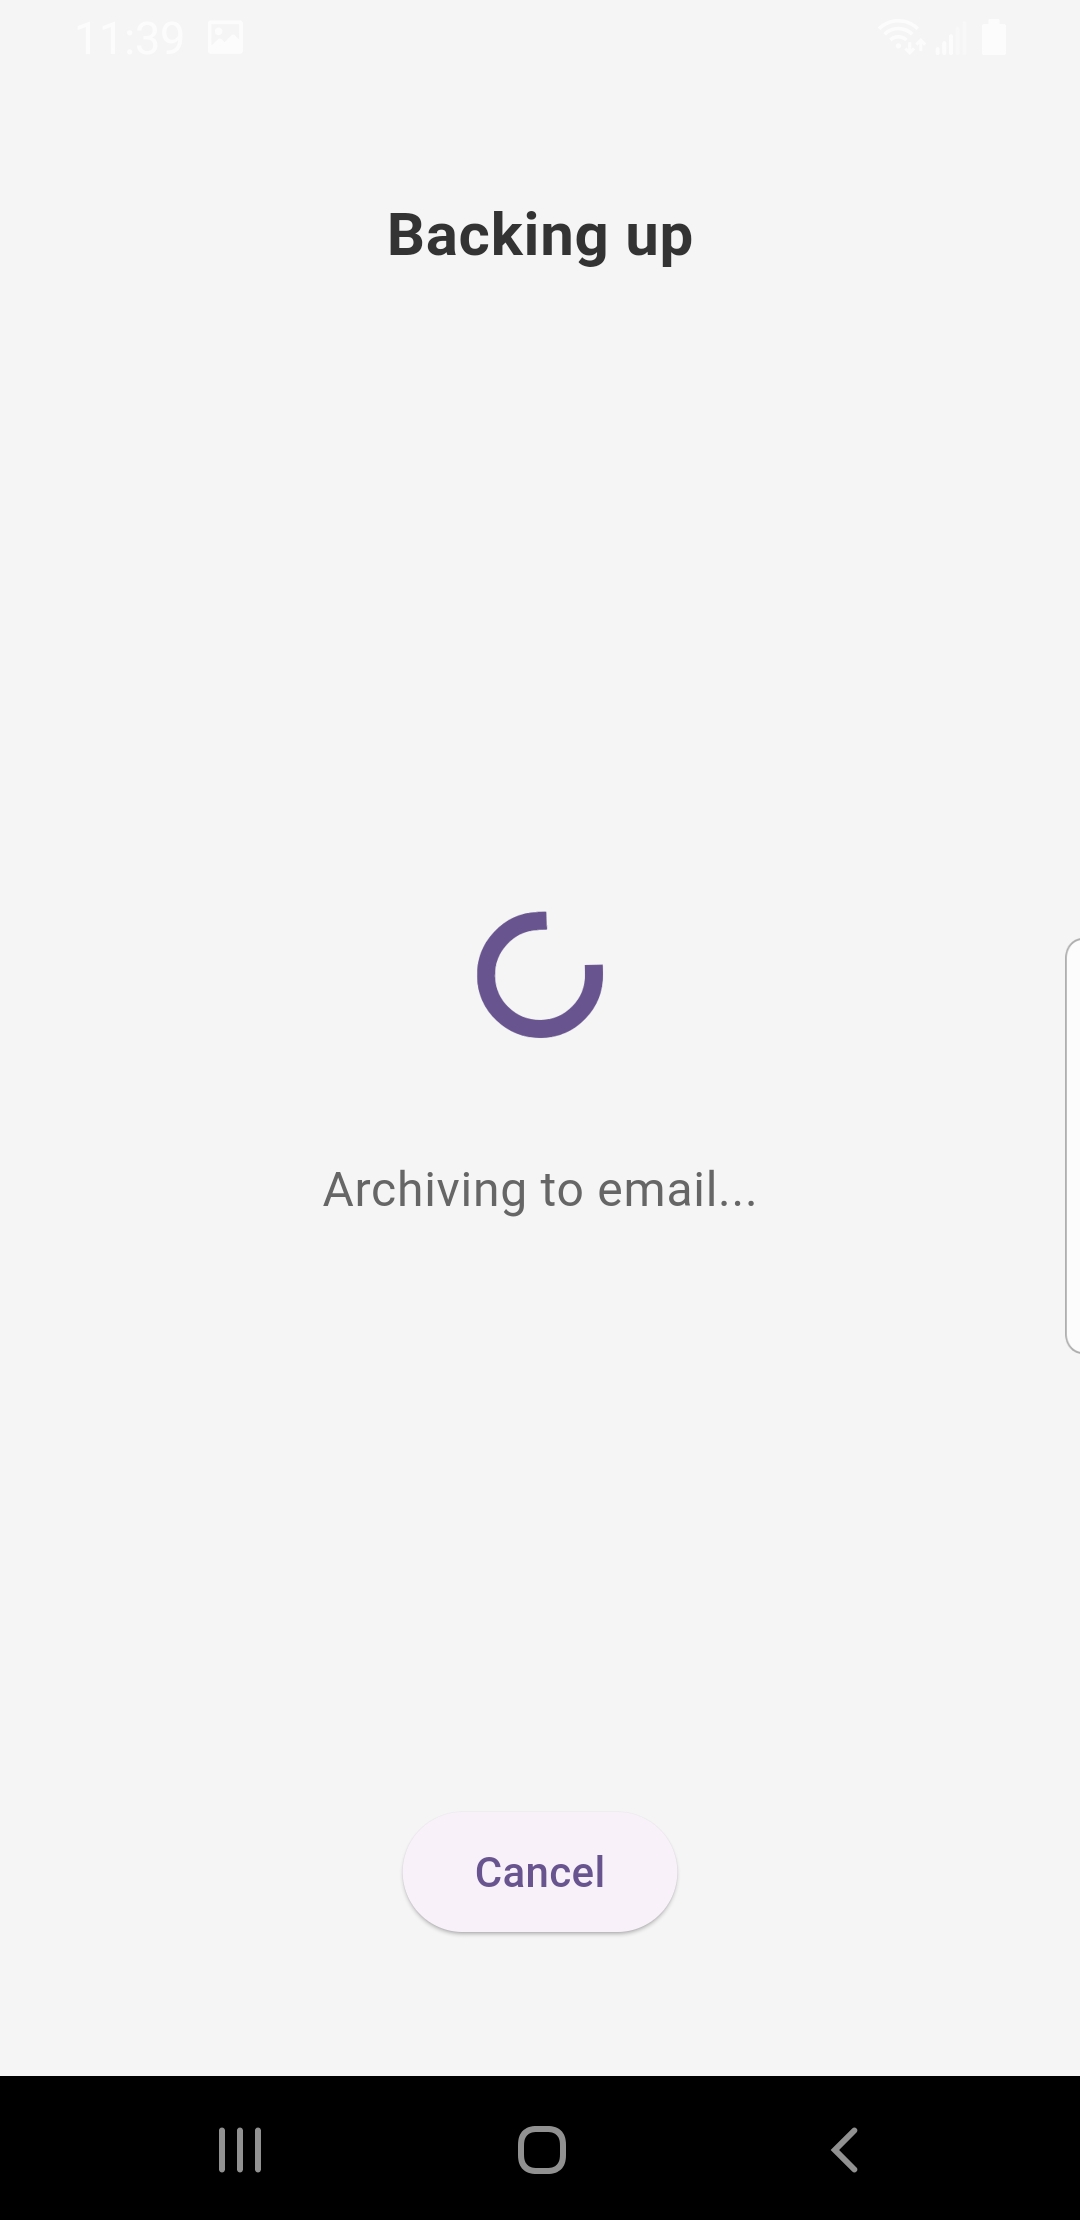
Open a backup type from the home screen, choose what to include, and tap Back Up to Email. Each screen shows the selected size against your email’s attachment limit, then displays Archiving to email… while it sends.
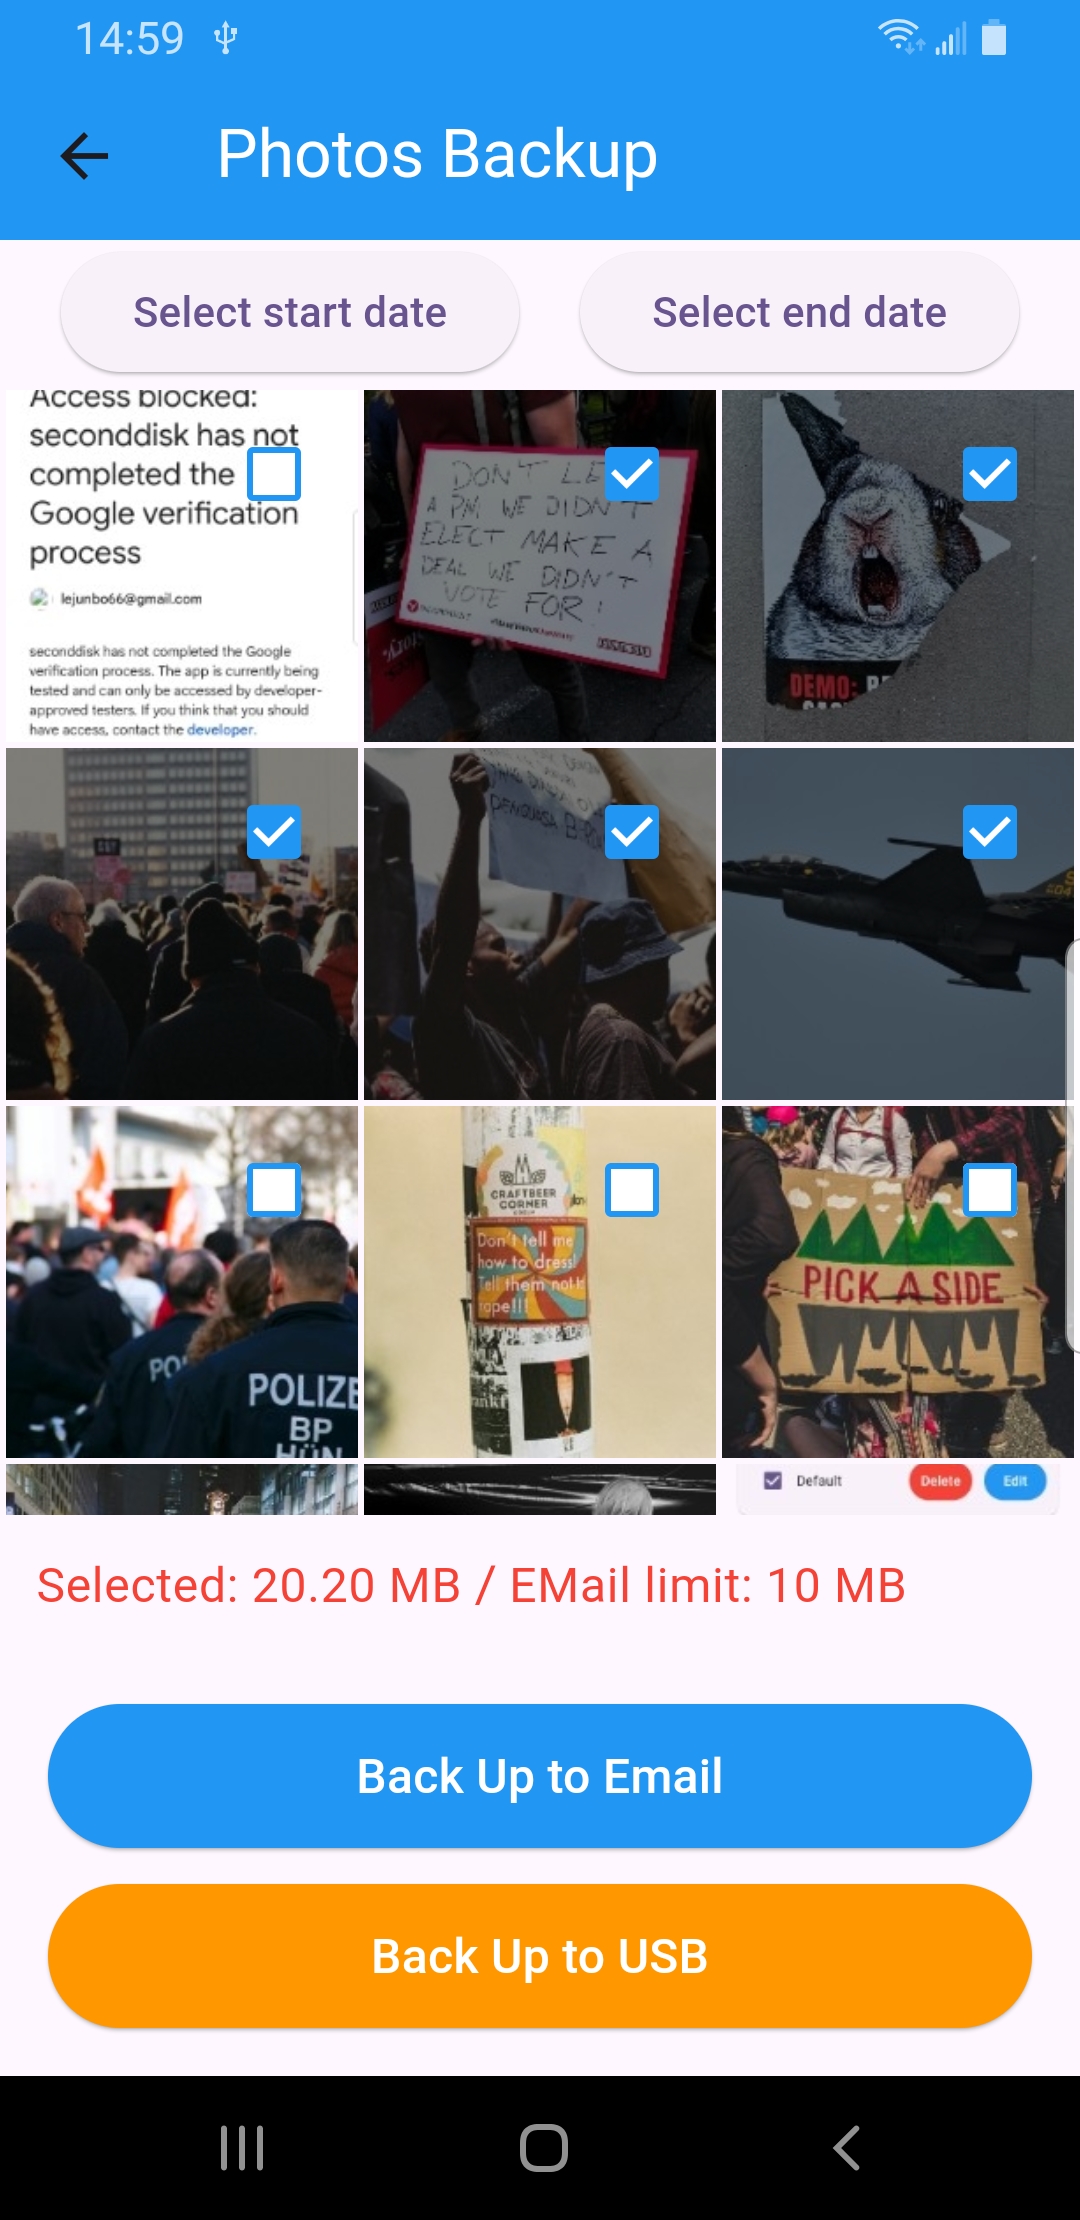
In Photo Backup, narrow the range with Select start date / Select end date if you like, tick the photos you want, then tap Back Up to Email.
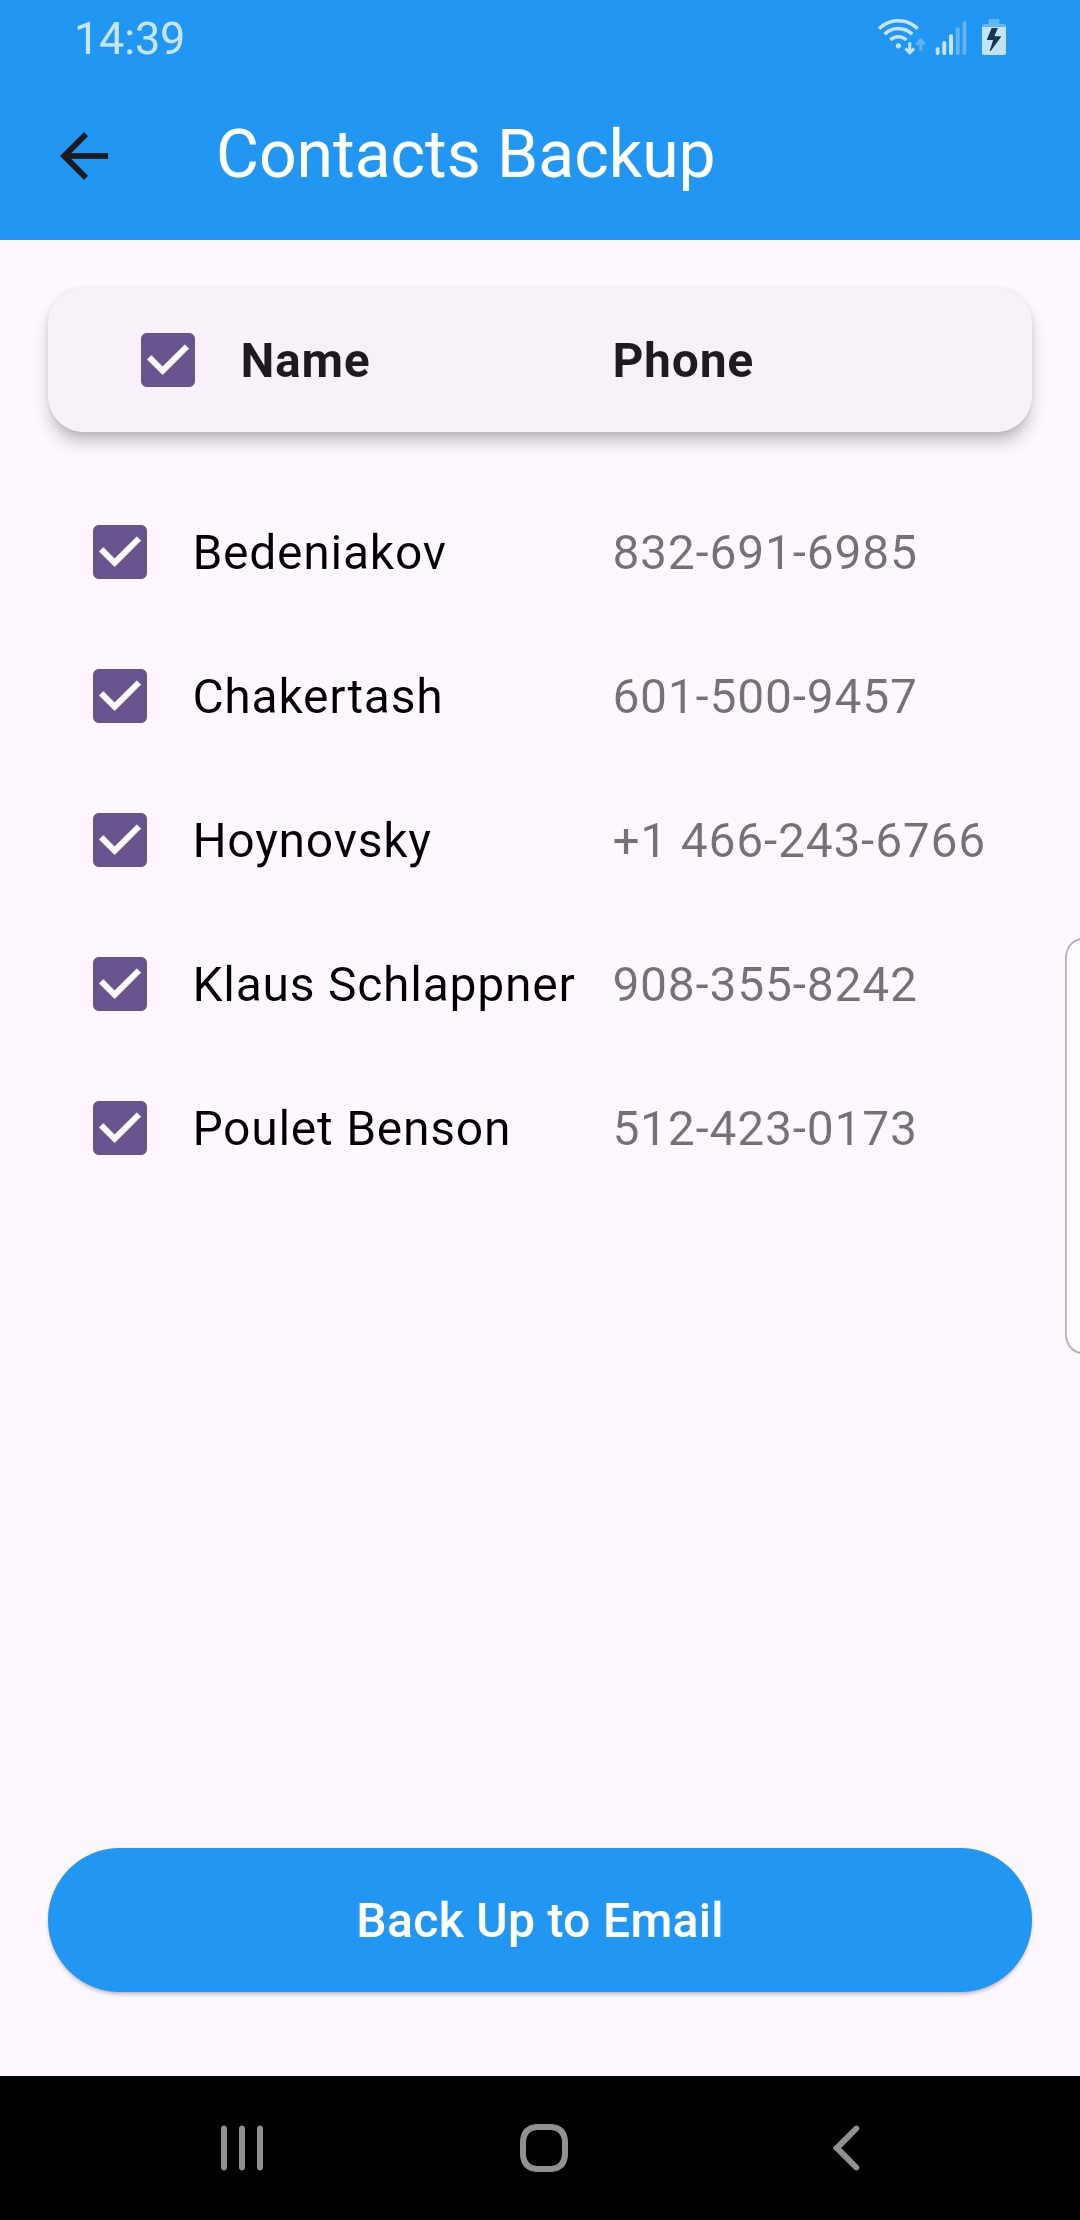
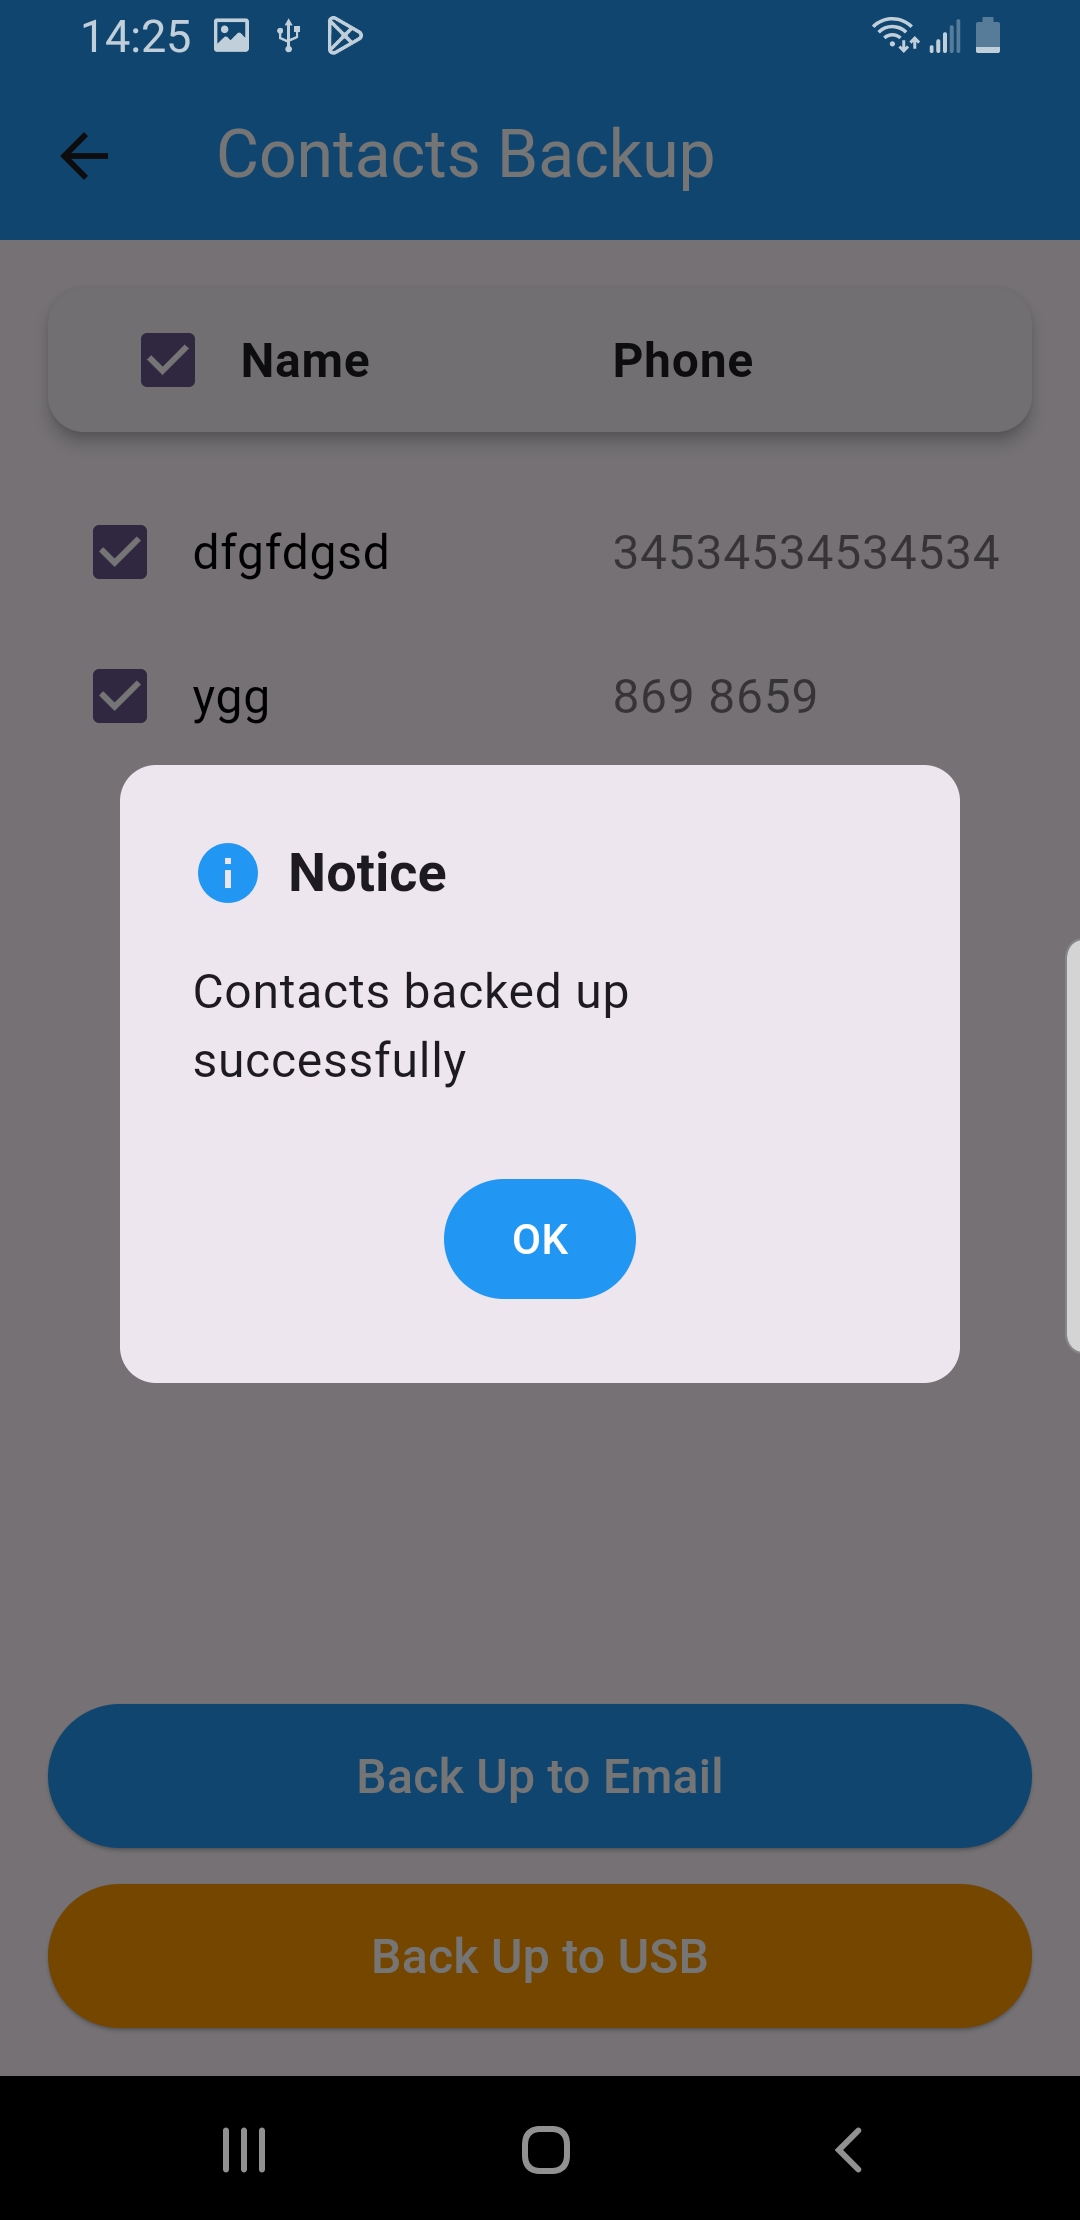
In Contacts Backup, tick individual names or use the header checkbox to select all, then tap Back Up to Email.
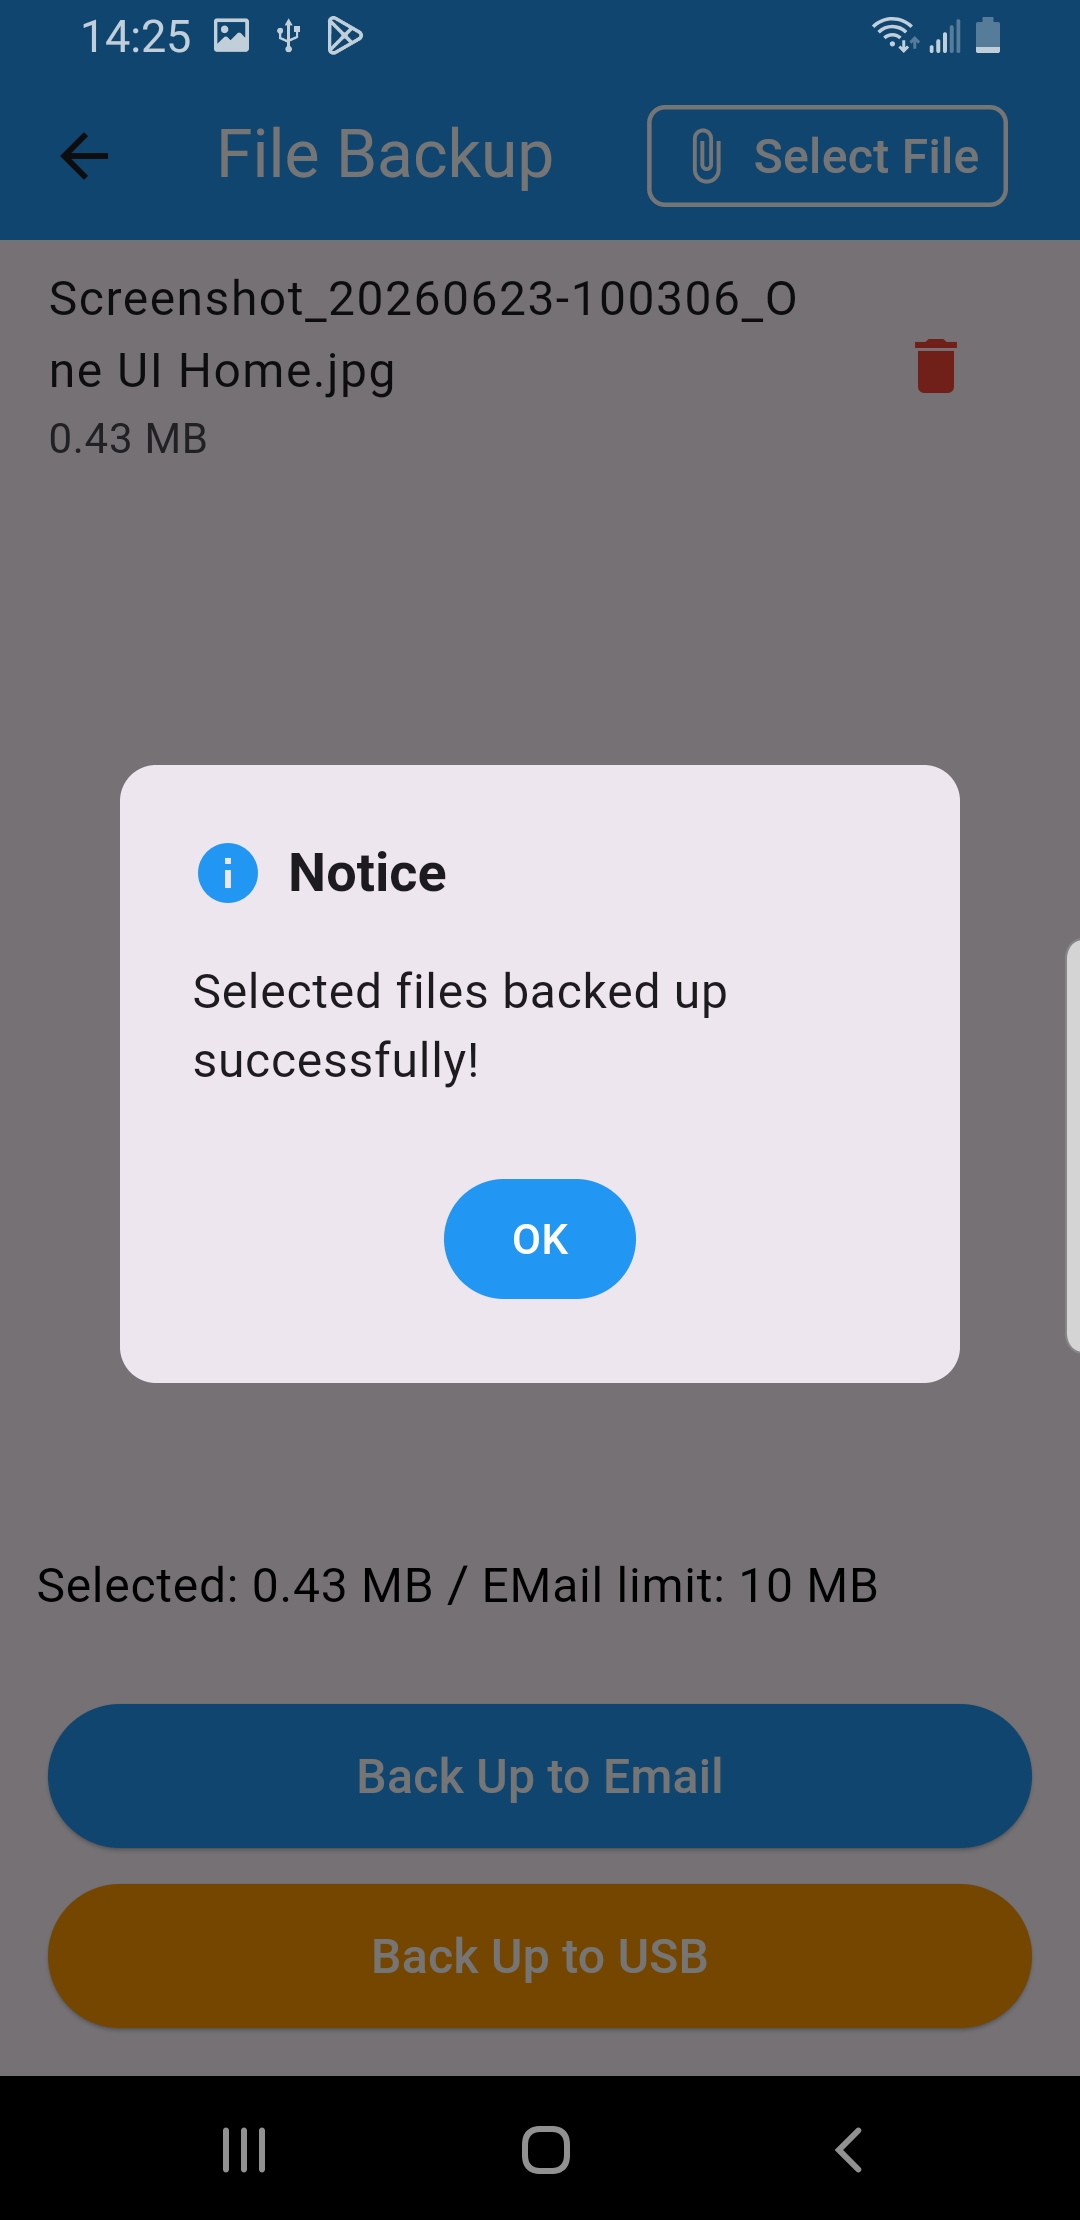
In File Backup, tap Select File to attach documents, then tap Back Up to Email.
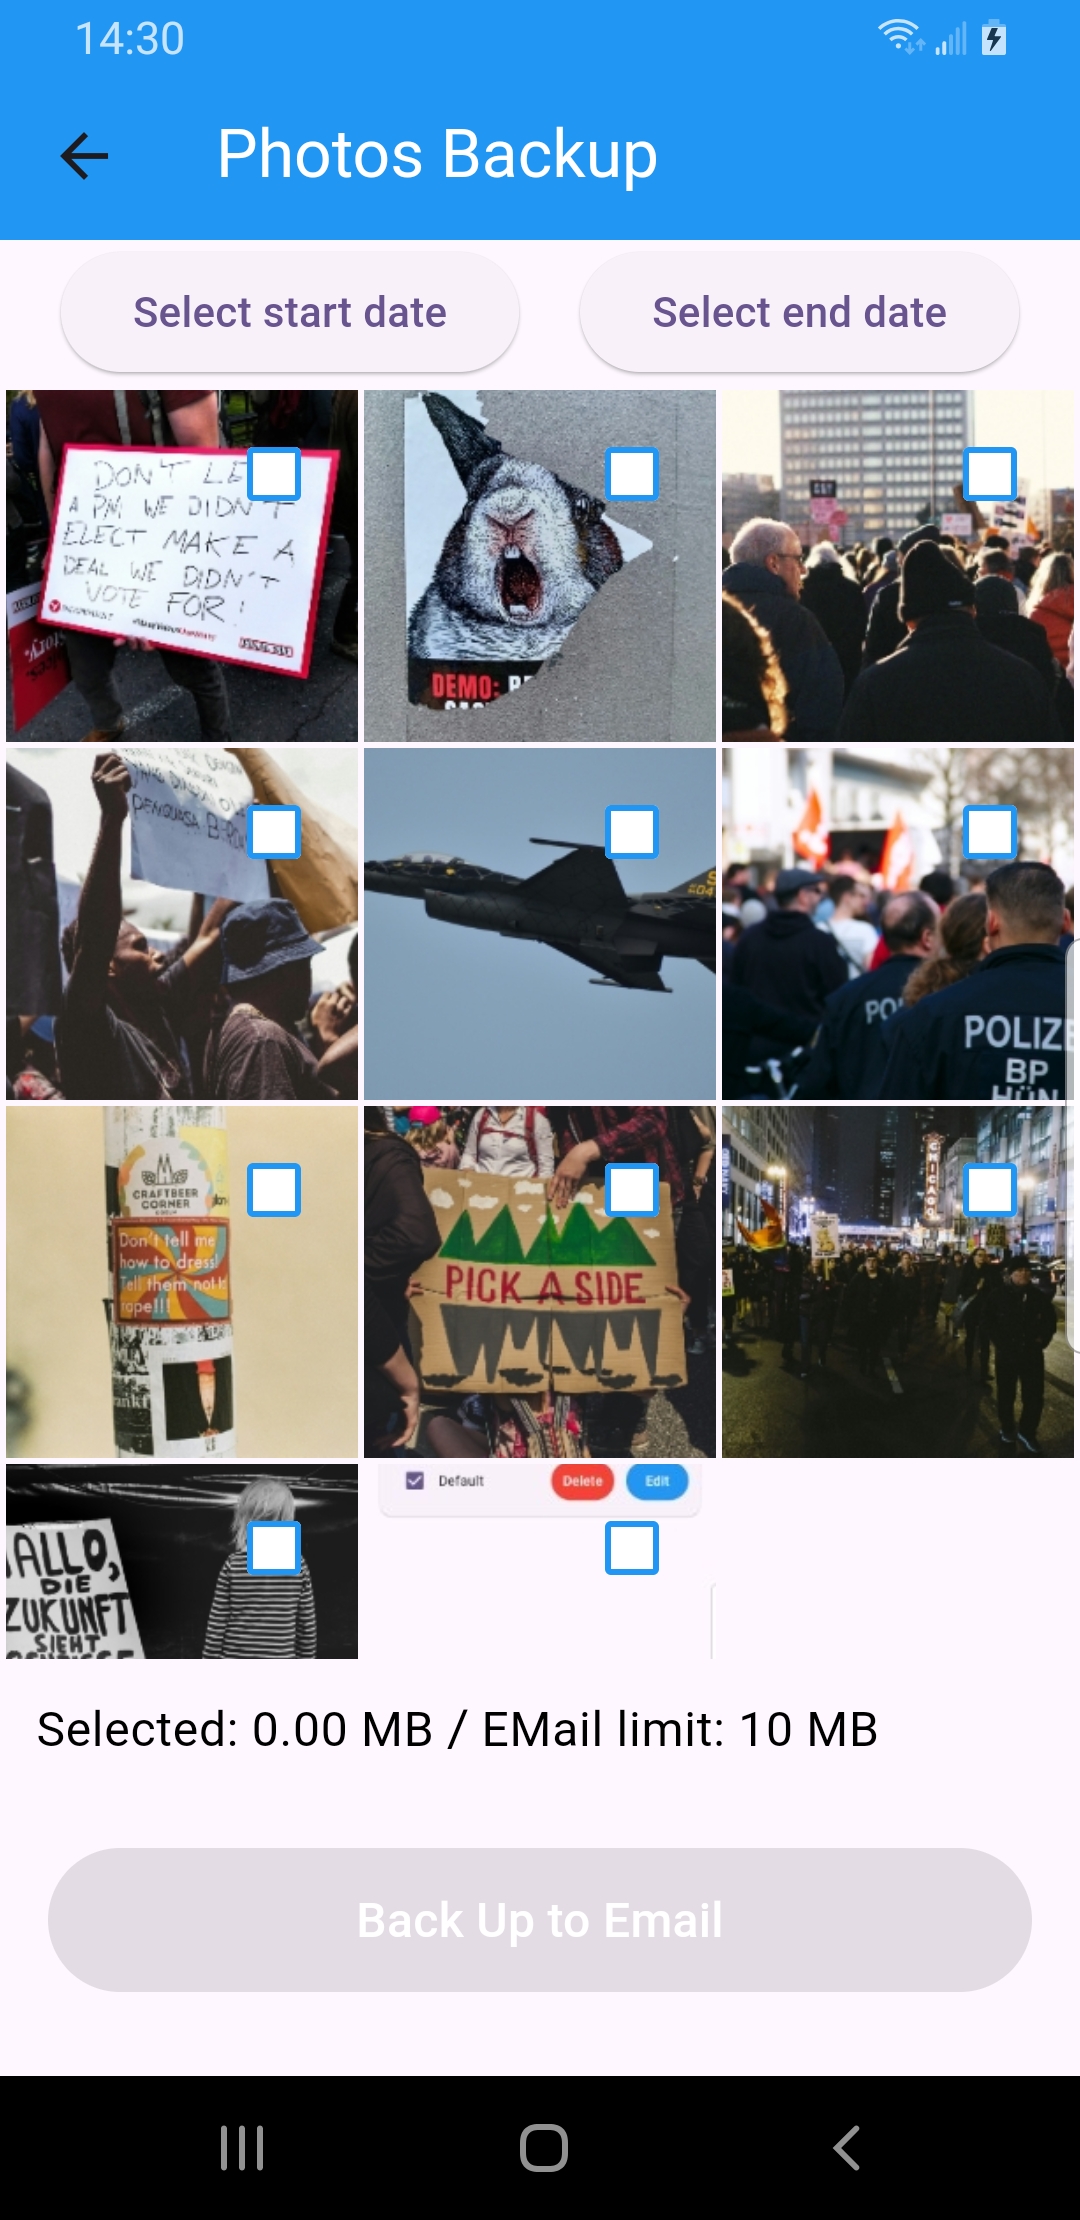
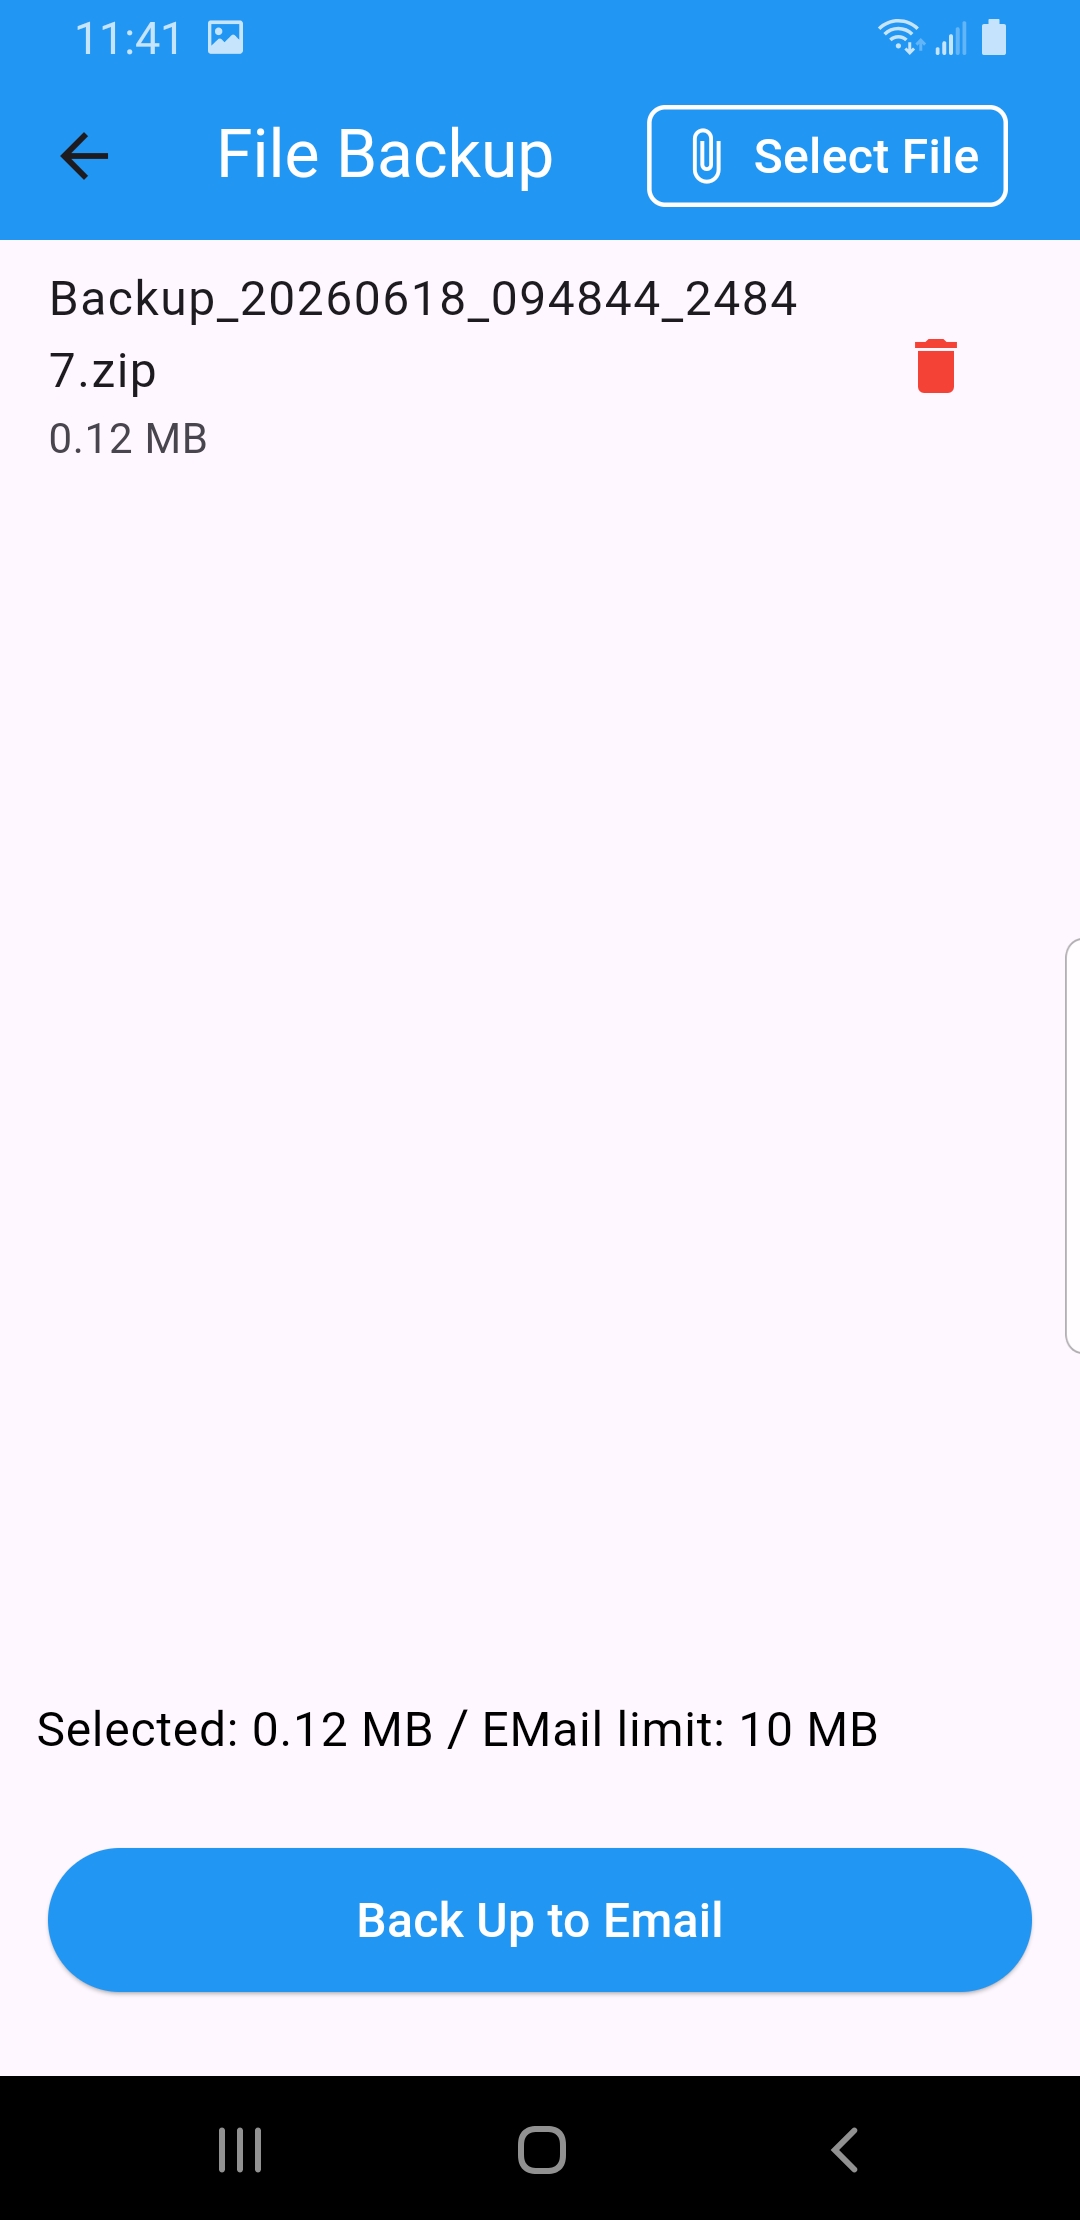
Mind the attachment limit: backups are sent as email attachments, so each one must fit under your email’s limit (SecondDisk shows Selected… / Email limit…). If a photo set is too big, shorten the date range or select fewer items.
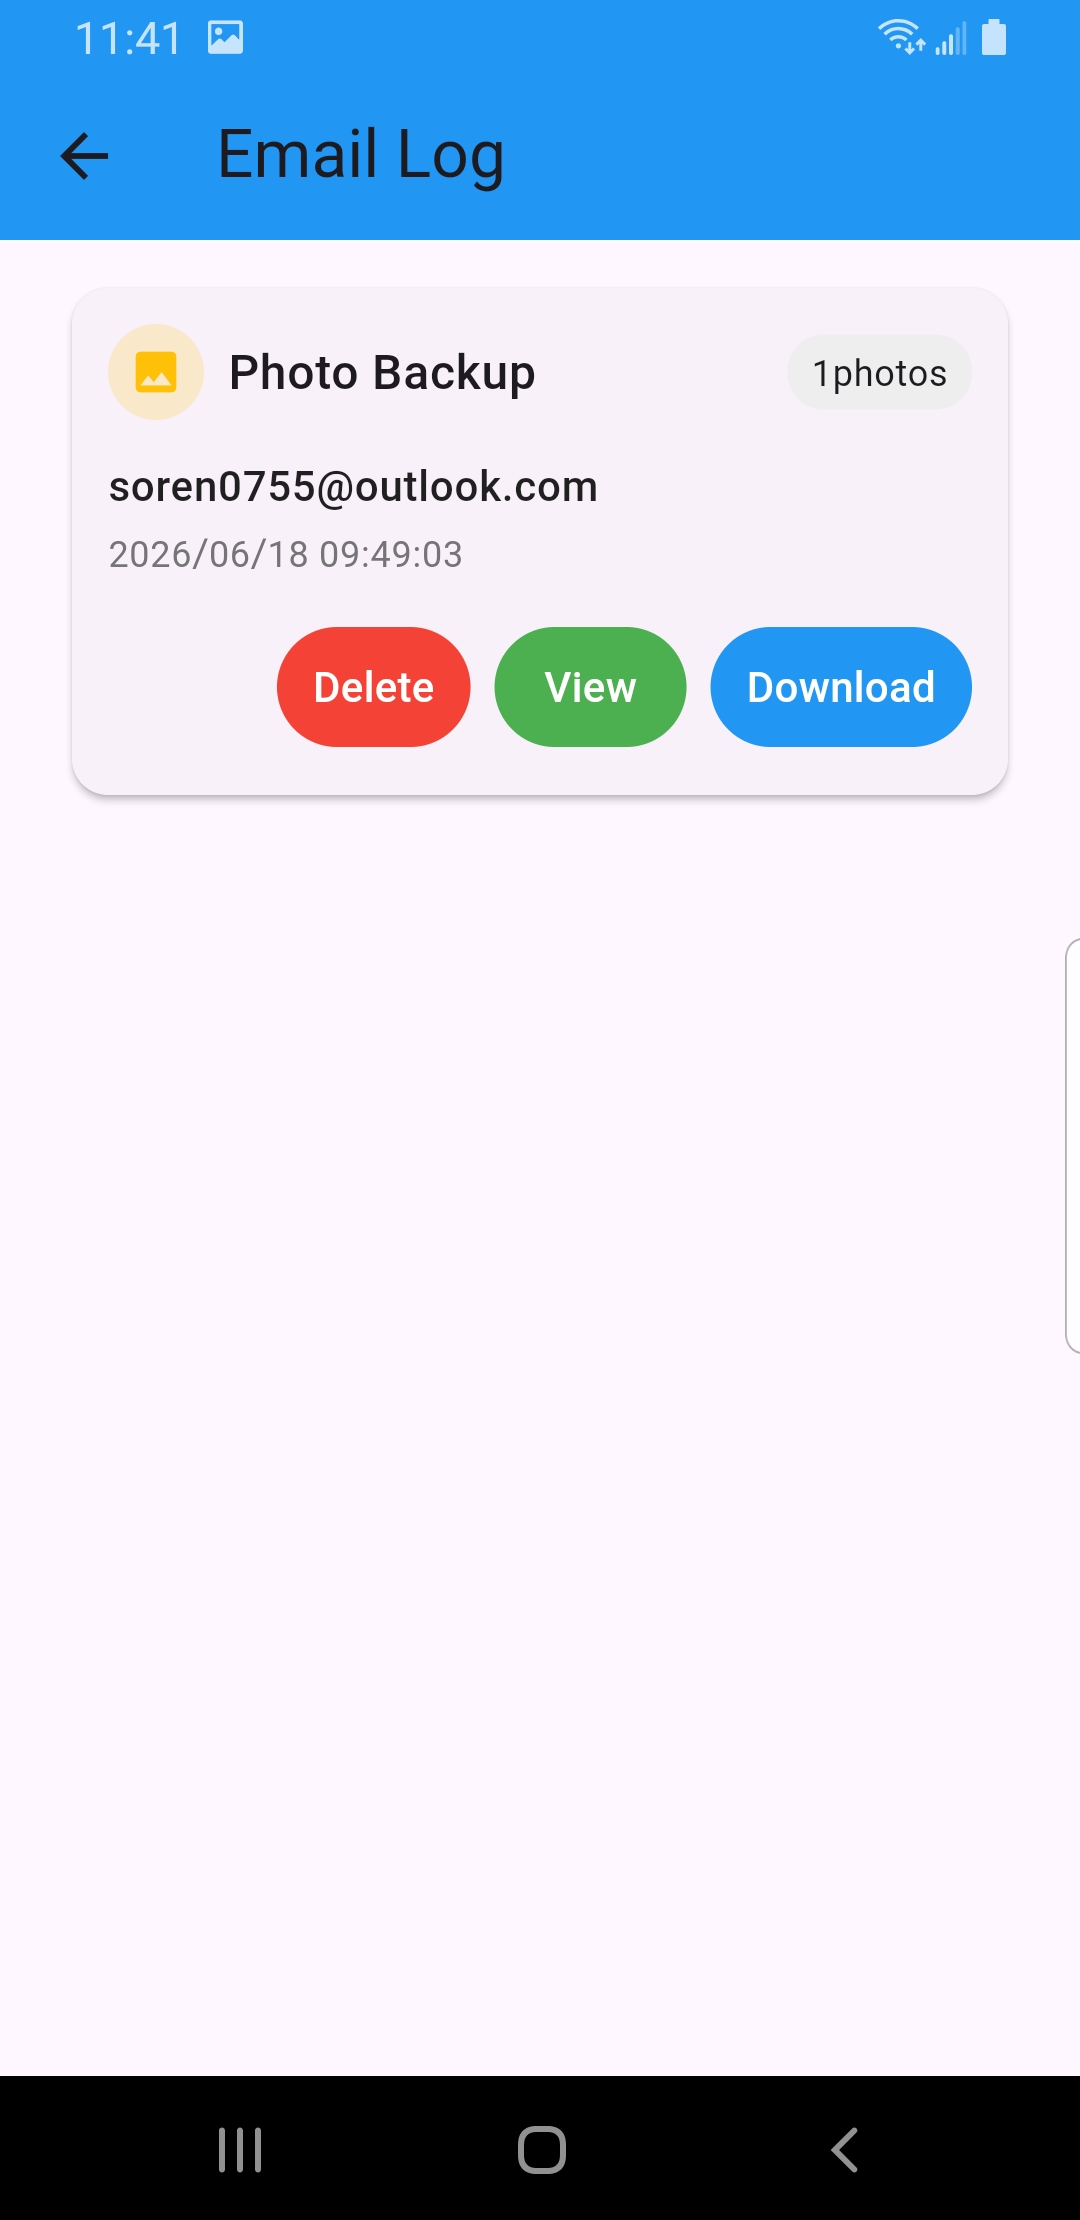
Tap Backup Records on the home screen to open the Email Log. Each entry shows the backup type, how many items, the email it was sent to, and the date.
Use View to preview a backup, Download to save it back to your phone, or Delete to remove the record.
Prefer a local copy you keep in hand? Connect a USB drive to your phone and back it up there too — no internet or email needed. Pick what to include on each screen, then save it straight to the drive.
Open the email SecondDisk sent and download the attachment, or tap Download on any entry in the in-app Email Log.
Contact backups are saved in a standard format, so you can open the file and import it straight into your phone’s Contacts app.